Cool Ice Dashboard App
-
Designed for desktop
-
Able to view inventory interaction logs, ice stock, bag stock, ice items, bag items, product items and customers
Our goal is also to enable the creation of new types of ice and lines of products with branded bags from the Dashboard. So far, this is partly possible.
Creating New Branded Ice Items
For example, go to the Product Type section, select the Bunny brand and then change the value of the "2kg Square" product to Y(es). This will automatically create branded ice and bag items based on values of the "Ice Types" section.
You can also freely create new "Product Types" entries, which represent branded products. The "Ice Types" section is not yet automated.
Adding new ice types
Basic ice types (e.g. 1.5kg Gourmet and 10x1.5kg Gourmet Baal) are the hardest to set up, but once it's done you can very quickly and easily add ice products (e.g. 1.5kg Gourmet Cool Ice and 1.5kg Gourmet Spar).
Even though it may appear needlessly convoluted at first, this system is designed to guarantee data integrity and accountability in edge cases, for example the cellphone losing its wifi connection.
Adding ice types in the dashboard
-
Open the Dashboard App, go to the Ice Types tab and click on the plus button in the bottom right.
-
For basic ice, enter an ice type ID in the style of "ice-1.5g" for ice 1.5kg Gourmet and a name. For baals, the pattern should be "ice-10x1.5g".
-
Enter the bag type ID in the style of "ice-1.5g" for ice 1.5kg Gourmet, or "ice-1.5gs" for a bag that is shared by ice 1.5kg Gourmet and ice 1.5kg Square. For baals, the pattern should be "ice-10x1.5" (without square/gourmet indication).
-
Enter the remaining information about prices and size, and whether the ice type should be auto-baaled. If you choose yes, then you need to create a corresponding baal ice type. Always choose no when adding baal ice types.
Informing the database about new ice types
- We have to manually inform the database about the new ice type. Open the AppSheet site and log in with the management@ account at:
https://www.appsheet.com/home/apps
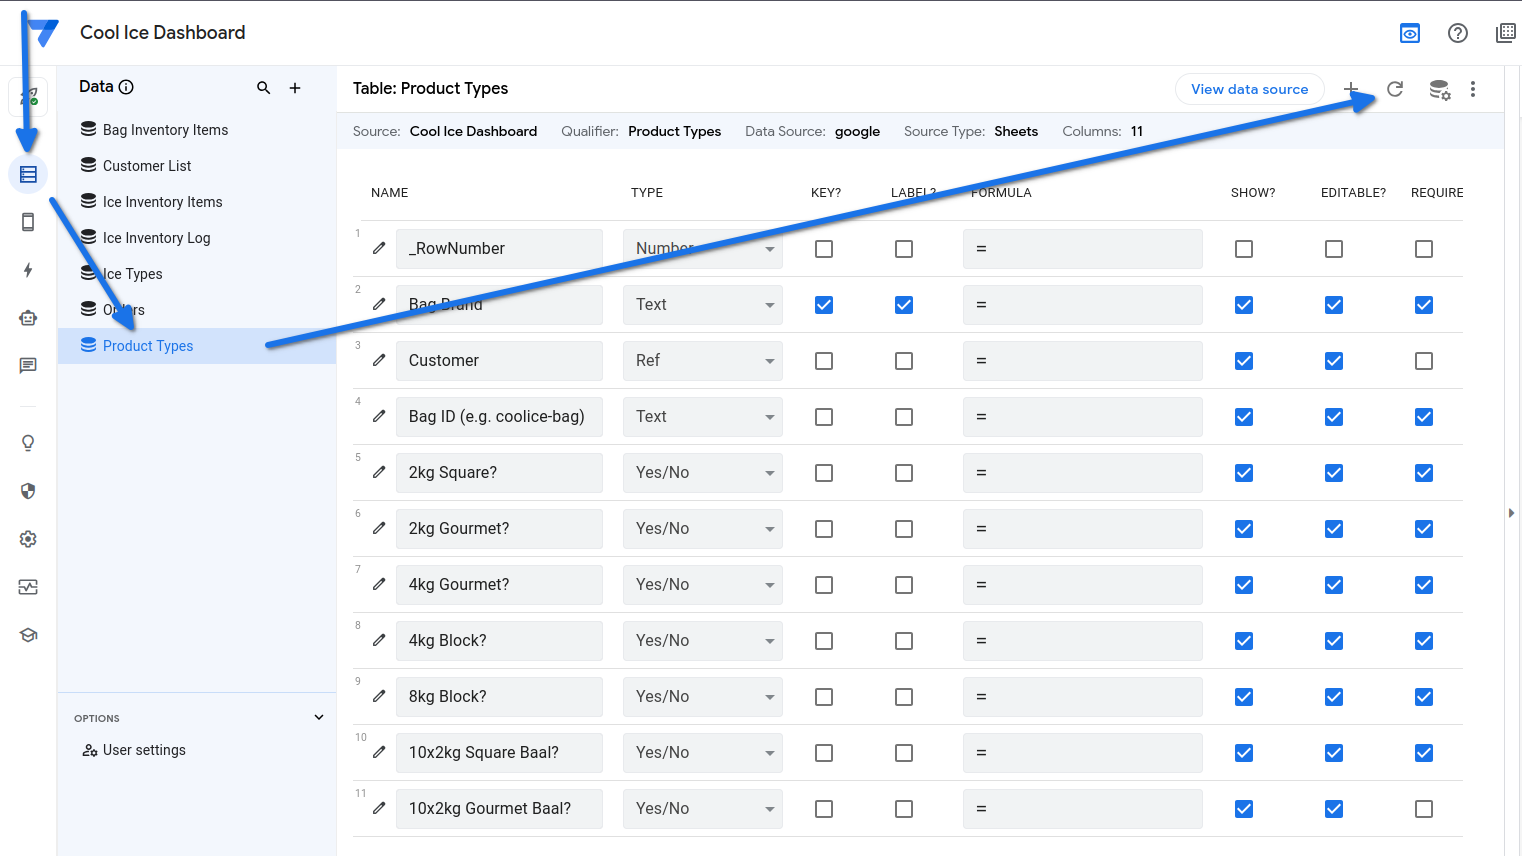
- Select the Dashboard App and in the Data section, select the "Product Types" database and then click on the refresh icon (regenerate schema).
- Repeat the same steps for the Inventory App.
Assigning the new ice types to product lines in the dashboard
-
In the Dashboard App, enter the Product Types tab and select an entry (e.g. Cool Ice) to open the details, then click on the edit button in the bottom right.
-
Select Y for the ice types you want to add to the entry and click save.
-
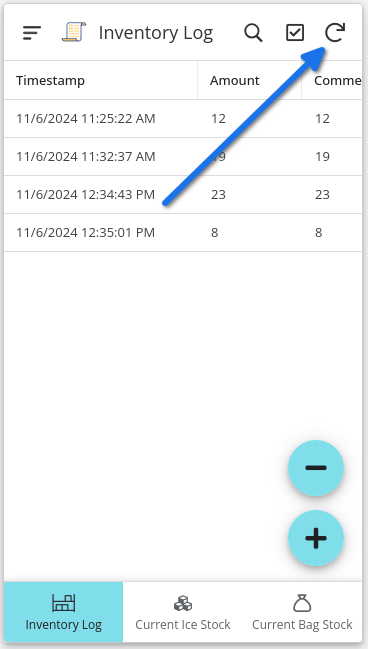
Refresh the Inventory App to see the new items, after that they are ready to be used.
Adding customers:
- Adding new customers allows for dropdown menus in the product types sheet to easily connect multiple bag brands to a single customer.